

The Adventurer's Guide to Astrophotography
To many, the idea of slogging up a dark trail at 12 a.m. to take pictures of the stars might seem like some kind of punishment devised by a disgruntled outdoor industry employee. However, these astrophotography outings can produce spectacular views and incredible photos that will keep you coming back for more.
Here’s everything you’ll need to know to get started with astrophotography.
What Exactly Is Astrophotography?
Astrophotography is a photographic discipline that allows you to take pictures of celestial objects that aren’t readily visible to the human eye. By using a unique combination of camera settings, you can capture light from distant stars, planets, and clouds of galactic dust. With most DSLR cameras, you can even photograph the Dumbbell Nebula, which exists over 1,300 light-years away from earth.
But, astrophotography is so much more than a style of photography. It’s an experience – one that will add an entirely new dimension of excitement to your outdoor trips. After you’ve learned the basics, every excursion into nature will become an opportunity to capture the beauty of the stars. Soon, things like light pollution levels and moon phases will become critical components of any backpacking trip you plan. Instead of retreating to your tent after the campfire dies, you’ll be itching to get your camera set up and start taking photos.

An Addiction Worth Pursuing
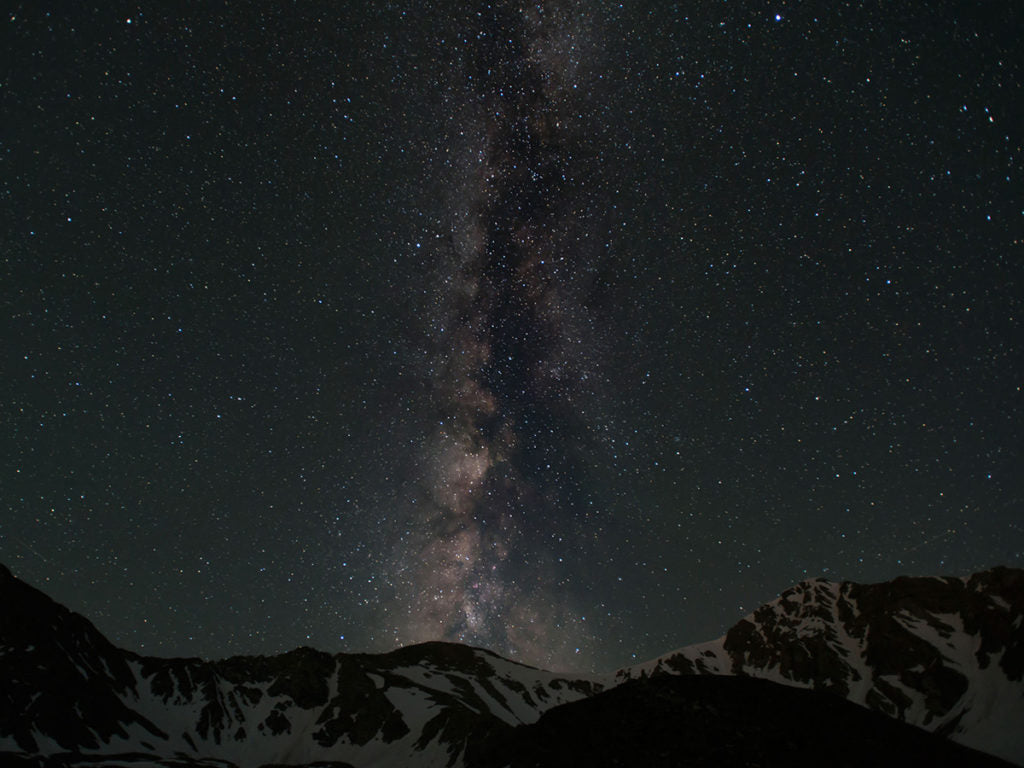
Astrophotography quickly becomes an addiction, and for good reason. Standing below thousands and thousands of stars while in the middle of remote wilderness is a powerful experience. It may send shivers up your spine, or cause you to reflect on your place in the universe. It may elicit feelings similar to those you’d experience after summiting a brutal peak or sending a tough climb. It will certainly leave you with something indescribable, something that you didn’t have before. Getting a few decent pictures out of the whole thing is just icing on the cake.
So, I implore you – use the guide below and give astrophotography a try on your next camping trip. With some planning and good weather, you’ll be taking beautiful star shots with ease.

Astrophotography 101: A Starter Guide
Use a dark sky map to choose a location.
Unfortunately, astrophotography can’t be done everywhere. The ability of your camera to photograph faint celestial objects depends entirely on the darkness of the surrounding skies and your proximity to sources of artificial light. If the skies above you are glowing with light pollution from a nearby city, it’s unlikely that you’ll be able to get a decent shot. To escape the plague of light pollution and find a dark zone, you’ll need to use a dark sky map.
Dark sky maps show us levels of light pollution in any given area and are incredibly useful when it comes to planning astrophotography photoshoots. Perform an online search for ‘Dark Sky Map’ and choose one from the results. Next, identify your intended location on the map and take note of light pollution levels in the area. Is your location in a dark zone? If not, can you hike or drive to a nearby location with less light pollution? Use the map to find the darkest spot possible that will be safely accessible after dark.
Plan for a new moon.
Cities and towns aren’t the only light sources that can ruin your star photos. The moon, which reflects light from the sun back towards earth, can brighten the night sky and drown out stars that would otherwise be visible. This means that you’ll need to plan your astrophotography shoot to coincide with the phases of the moon. Perform an online search for a moon calendar, and plan your trip for a date that is as close to the next new moon as possible.

Assemble the necessary gear.
Having the proper gear for astrophotography makes the entire experience much more enjoyable. Collect the equipment below, and make sure that you’ve tested everything when it’s still light out. Dealing with a camera issue or broken headlamp is a lot easier when the sun is up!
-
DSLR or semi-DSLR camera. Any camera that allows you to manually control aperture, shutter speed, focus distance, and ISO will work perfectly.
-
Wide-angle lens with f/2.8. Wide angle lenses tend to work best for astrophotography, as they allow you to capture a larger portion of the sky than a longer lens would. A range of 17-35mm and a minimum f-stop of 2.8 or less is ideal.
-
Sturdy tripod. A sturdy, adjustable tripod is necessary. A good tripod allows you tilt your camera up towards the sky without having to worry about it falling backwards.
-
Headlamp. Although not required, a headlamp makes life easier by freeing up your hands and allowing you to adjust your camera between shots.
-
Warm clothing (jacket, gloves, hat). Air cools dramatically at night, so dress accordingly. An insulated jacket, gloves, and winter hat make late-night photoshoots much more comfortable.
Dial in the camera settings.
Aside from having the correct gear, learning how to adjust your camera settings properly is the most important step in astrophotography. Luckily, it’s easy to do and takes just a few seconds – use the settings below as a starting point:
-
Aperture wide open. Set your aperture to the lowest f-stop possible. You’ll need to hit f/2.8 or lower to take crisp, sharp star pictures.
-
Focus to infinity. Focus your lens to infinity. Any less, and you’ll end up with fuzzy stars in your photos.
-
Shutter speed 12-24s. This is a good starting range and usually allows you to capture tack-sharp photos of the stars.
-
ISO 2400-3200. A high ISO is necessary to pick up light from fainter stars and celestial objects. If you set ISO too high, however, your pictures might look grainy and unattractive, so start off in the 2400-3200 range.
-
Long Exposure Noise Reduction – ON. If your camera has this setting, make sure to turn it on.
-
Timer delay – 5 seconds. If possible, set a timer delay for a minimum of 5 seconds. This will prevent vibration caused by pressing the shutter button from affecting your pictures.
By using the camera settings above, you’ll produce solid star photos, but don’t interpret these settings as absolute limits. In fact, you should use them as a jumping-off point for experimentation! Change the shutter speed or tweak the ISO – your subject isn’t going anywhere, so take the time to get creative.

Make the experience comfortable.
As mentioned earlier, astrophotography can be an exhilarating and powerful experience. However, there are a few things that you can do to make the experience even more enjoyable:
-
Bring a reclining chair to make stargazing easy. A lightweight, reclining camp chair makes all the difference when you’re in between shots and want to enjoy the skies. A chair similar to the NEMO Stargaze™ Recliner Luxury Chair is ideal, as it naturally reclines and allows you to observe stars without craning your neck.
-
Fill a vacuum-insulated thermos with coffee or tea. Late nights spent outdoors can get chilly, so bring along a hot beverage in a vacuum-insulated thermos to keep yourself warm. Bonus points if you use our guide to brewing coffee in the wild!
-
Give light painting a try. Light-painting refers to the act of illuminating the foreground of a photo with a light. It’s a great way to add depth to a star photo, and can easily be accomplished with a flashlight or headlamp. The technique is simple – turn your light on while your camera’s shutter is open, and ‘paint’ the foreground by moving your light back and forth.
-
Don’t forget to put down the camera. It’s easy to get caught up in the excitement of taking beautiful star pictures, but make sure you dedicate time to appreciate the view above you. After three or four shots, take a few minutes to slow down. Set the camera aside. Have a sip of coffee from your thermos and relax in your camp chair. Try to appreciate the beauty of what you’re seeing!

Go find some stars.
Now that you’re prepped on the basics of astrophotography, it’s time to plan a trip and take some pictures. Find someplace wild, consult the moon calendar, and get out there!
John Salisbury is a Colorado native who loves to get out into nature. When he's not photographing stars, John enjoys hiking 14ers and camping in Colorado’s backcountry.